The Grip
The correct golf grip is the key to a better golf swing.
The Correct Golf Grip (Placing Hands on the Club): Learning how to place your hands on the club is the final part of a good setup and a very important one for a better golf swing. Let me show you how to properly hold the club in order to better groove your swing in the process.
The Correct Golf Grip (Part 1): If you prefer to wear a glove, you should always wear it on the top hand (left hand for right handed players). The following directions can simply be reversed for left handed players.
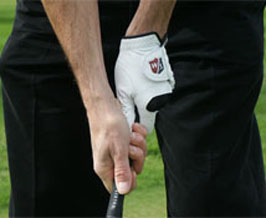
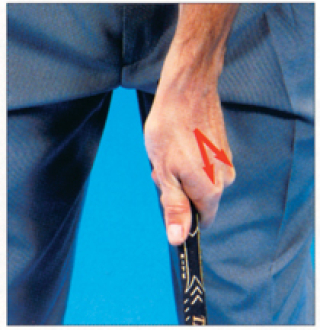
Where do you grip the club? As you can see from this picture, there is a gap of about 1 1/2 inches from the butt end of the club to your little finger. This will make the club feel slightly lighter and will also give you better control to achieve a correct grip.
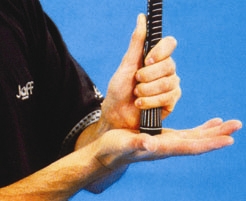
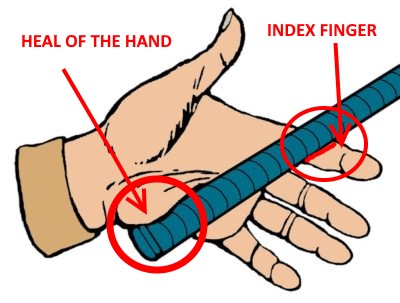
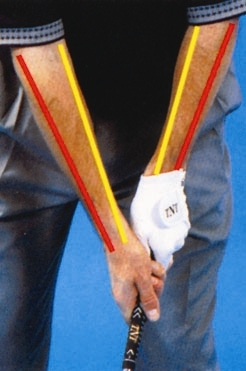
The Left Hand: The club should pass diagonally across the lower part of the palm of your hand as illustrated in this photo. You should be holding the club with more of your fingers than with the hand itself.
Looking Down at Your Grip: When placing your left hand on the club, you should see the first two knuckles. This insures that your hand is placed correctly and you have a correct golf grip with that hand.
The Left Thumb: When I was a junior, this was one of the best golf tip that improved my game. Your thumb should be placed slightly to the right side. This is very important because it will enable you to support the club at the top of the back swing. You should also be able to see your first two knuckles as shown in the image below.
To Check: To ensure that the thumb is placed correctly, you can check by placing the first two fingers of your right hand over the thumb and the grip simultaneously.
Left Hand Grip Check: If you can support the club with only the heal of the hand and the index finger, as shown, is a good indication that the club is properly placed in the left hand.
The Right Hand: This online golf tip is probably my favorite when talking about the golf grip.
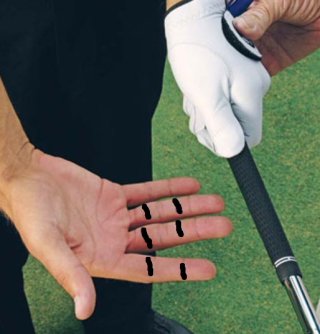
The right hand is a finger grip. Holding the club more in the fingers will promote better control and more distance as a result of generating greater club head speed. It also runs diagonally across the fingers.
The Right Crease: The left thumb should rest snugly in the crease between the thumb pad and the heal pad of the right hand to produce a better golf swing.
How to Place Your Hands on the Club: Where are the pressure points? Does the grip affect the direction of your shots? The grip is the only link from your body to the club. Learn how to place your hands correctly on the club. How tight should we hold the club and why is it important to keep constant pressure during the entire swing? There are some variations to holding the club. The golfer can choose the one he/she prefers but from these preferences, similar aspects of holding the club remain the same.
The V’s: The “V’s” formed by the thumb and forefinger of each hand should parallel each other and point slightly toward the right shoulder.
If you are really serious about wanting to learn how to play golf, you must start by reading and understanding how this game is played.
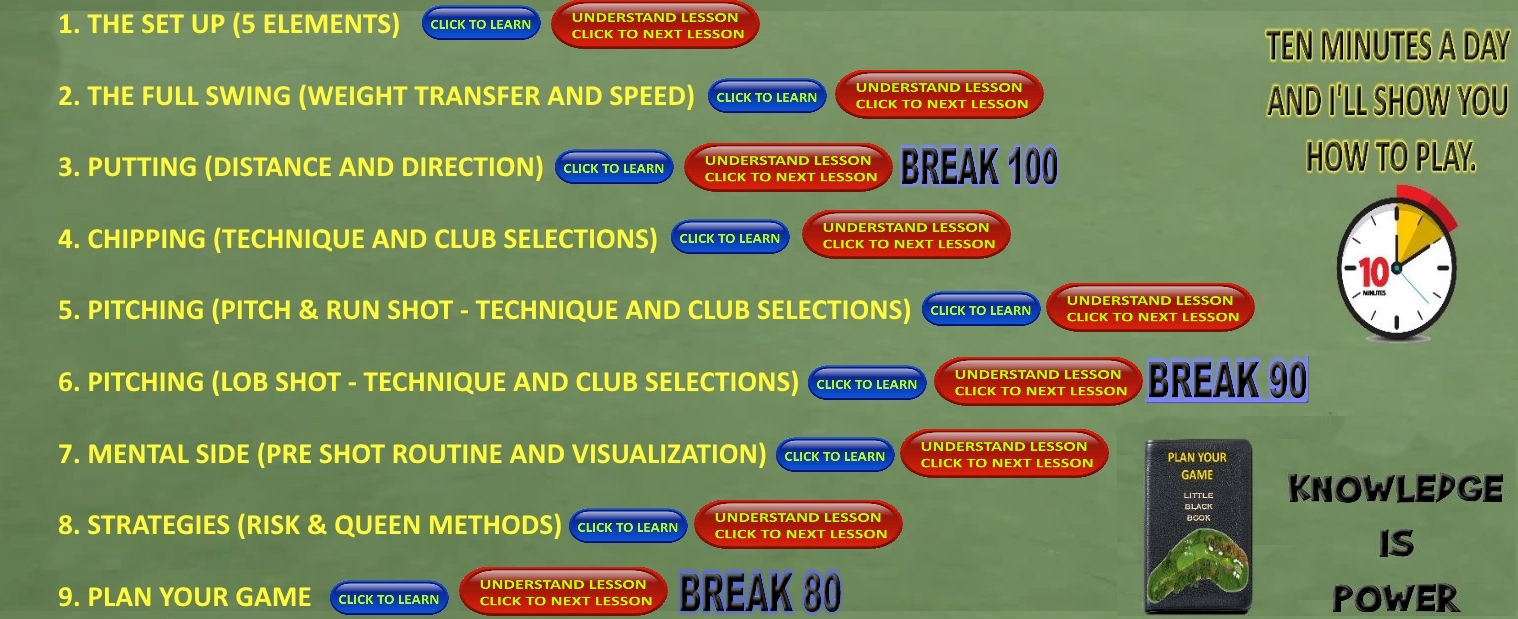
This educational program will provide you with approximately 4 hours of golf lessons by e-mail. “10 MINUTES A DAY AND I’LL SHOW YOU HOW TO PLAY” online.
Each lesson is approximately 10 minutes long. You will receive a “10 minute lesson”, every 2 days via your e-mail.
Every lesson will take approximately 10 minutes to learn and understand. CLICK HERE for a sample lesson or click the image below.
These lessons will explain different aspects of the golf game such as: the setup, alignment, grip, transfer your weight, full swing, putting, chipping, pitching and much more.
You will also learn how to use muscle memory, visualization and your little black book.
These lessons will explain different aspects of the golf game such as: the setup, alignment, grip, transfer your weight, full swing, putting, chipping, pitching and much more.
You will also learn how to use muscle memory, visualization and your little black book.
This program will also teach you different techniques, with numerous educational drills, used to produce the best swing at each and every positions throughout the golf course.
These educational drills will explain in details, with pictures and videos, how to use each and every golf club in your bag.

Welcome to my “Step by Step Home Interactive Golf Program” where you will learn the following:
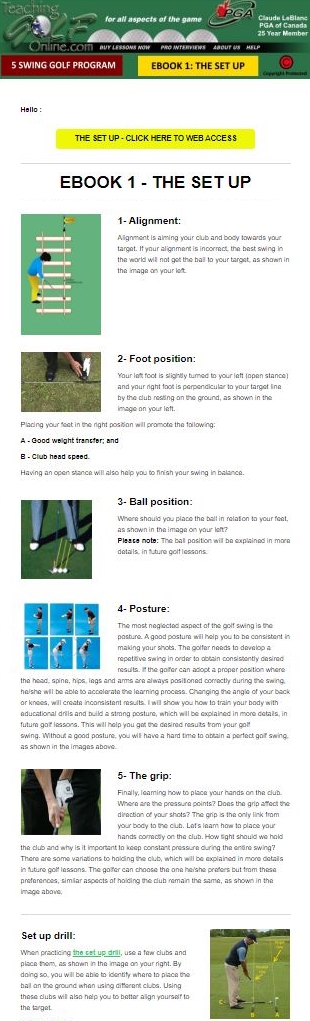
1- Set up (5 elements);
2- Full swing (weight transfer and speed);
3- Putting (distance and direction);
4- Chipping (technique and club selections);
5- Pitching (pitch & run shot – technique and club selections);
Pitching (lob shot- technique and club selections);
6- Mental side (pre shot routine and visualization);
7- Strategies (risk & queen methods); and
8- Plan your game
Why wait, you know you want this. If you wish to sample golf lessons, we will provide you with lessons from E-Book 1, free of charge. Please sign up on the form below. so now is the time to TAKE ACTION. The information is all there for you to learn, practice, play and have fun all at the same time.
This “5 SWING GOLF PROGRAM” EBOOK 5, also makes a real nice gift for all occasions, such as Christmas, Birthdays, Fathers’ Day, Mothers’ Day or maybe a gift for a friend or even yourself. JUST CLICK THE “SHOP NOW” BUTTON BELOW AND ENJOY!